Linux tip, Fedora tip / howto: Fixing the Epson Perfection 4490 scanner ratchet noise |
Note that these tips are mostly outdated
back to notes and tips index
Try my online puzzle page with ![]() Calcudoku, Killer Sudoku and online Sudoku.
Calcudoku, Killer Sudoku and online Sudoku.
Linux tip, Fedora tip / howto: Fixing the Epson Perfection 4490 scanner ratchet noise |
Try my online puzzle page with ![]() Calcudoku, Killer Sudoku and online Sudoku.
Calcudoku, Killer Sudoku and online Sudoku.
Fixing the Epson Perfection 4490 scanner ratchet noise (related tip: using the Epson 4490)
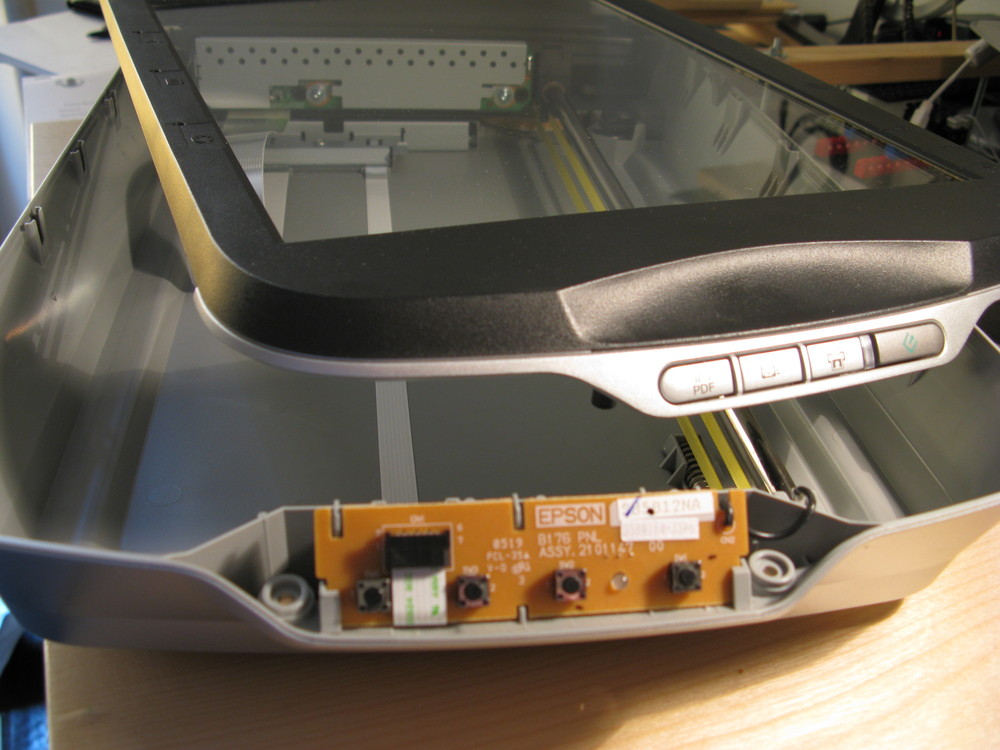
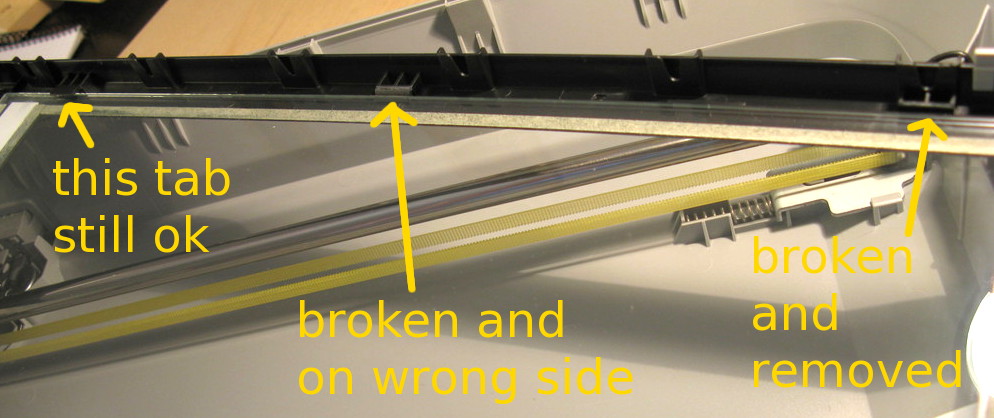
Update: after about 8 years of service, my 4490 did one more scan of some 8mm film, and then decided to call it quits :-( When scanning a heavy book, you may get the following: the scan head stops, and a terrible grinding ratchet sound is heard from the scanner. When you hear this, switch the scanner off immediately. Even worse, from that moment on you may never be able to scan again without this problem occurring. It is caused by the fact that on one side the glass plate is supported by three very flimsy plastic tabs, which bend downwards when some pressure is applied to the plate (as from a heavy book). On this page I describe a possible fix.
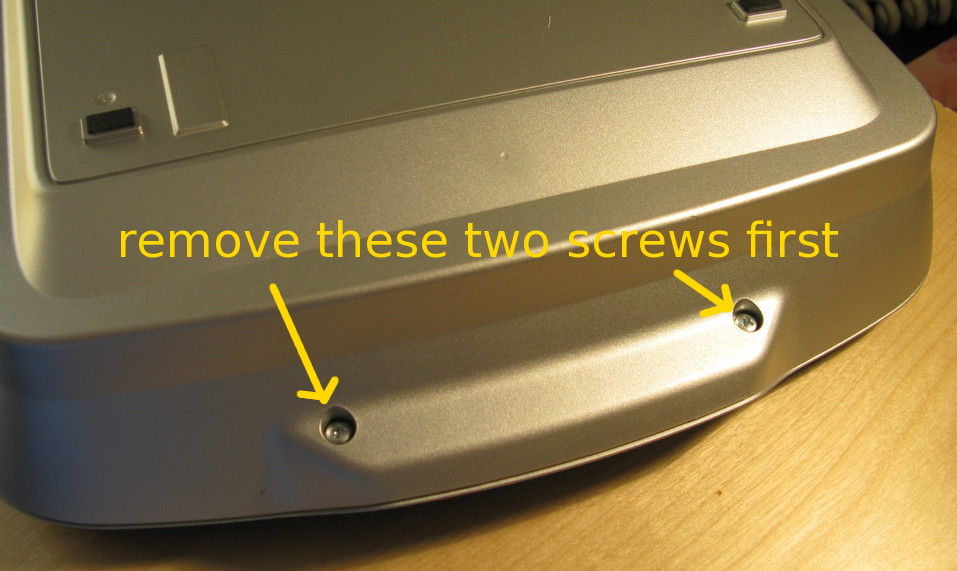
Opening the scanner


Some additional info a reader sent to me:Thank you for pointing out the small clearance between glass & carriage - I had been quite baffled.However, in my case the glass is still quite well attached to the case. If you push down on the middle of the glass, it is obvious that the case is ridiculously flimsy; the top at the back sags, the sides of the top section twist and the bottom sides bend out and down. Thus, moderate pressure will move the glass bodily downwards; push down on a book spine to flatten the page and you are in trouble! The carriage guide rod seems to be slightly higher at the front end than the back, relative to the case edge - about 1 mm. I have inserted washers between the case sections at the screw positions 1.2 mm thick; this, combined with more cautious manipulation of the book spine seems to have done the trick. But it's not ideal, as it doesn't address the fundamental lack of case stiffness - an appalling piece of product design. Incidentally, the much cheaper 3490 model has a completely different case design with a full-depth upper section and is appreciably stiffer.
And another reader sent this:My fix was to glue down the front edge of the glass. It was just loose enough to cause the carriage to lock up half way down the bed even with light pressure on the top of the glass.
More info about a fix sent recently (November 2014):This solution for fixing the Epson 4490 Scanner was brilliant! I was able to find all the parts needed at Lowes, total cost was $6.
And another reader sent this (July 2015):I've solved it with some hot glue, placed in the same position as the original holders and extra spots to improve the main system. Hold the glass and plastic support firmly together while the glue is cooling, and let the material grip well on the plastic body. Take care of little glue wires, don't let them grip on the glass, so work from the borders, never pass over the glass to prevent issues. Hoping this will help.
Some info on the plastic casing from another reader (November 2017):I found that even if the glass plate supports do not give way, the thin, weak plastic used for the bottom part of the case is apparently not chemically stable and softens over time. This allows the considerable weight of the top parts (glass plate plus lid/film scanner) to eventually make the sides of the case bottom bulge out a bit, thus decreasing its height and causing the moving carriage to drag against the inside of the glass plate, resulting in the loud ratcheting noise. My 4490 is hardly ever used and has spent most of the last 9 years sitting on a shelf, but it just now started making that noise.Examination showed that the glass plate was still in place (one flimsy plastic side tab had fallen off), held by adhesive strips and the remaining tabs; so, as the bottom part of the case could not be reformed, I did the add washers trick (on the 4 end screws holding the case together) suggested earlier by another reader - they simulated restoring the height of the case bottom enough to allow the moving carriage to clear the glass plate. In this case a washer thickness of just 0.01-0.02 inch (0.25-0.5 mm) was enough, but possibly more will be needed as time passes and/or heavy books are placed on the glass. To lessen the plastic case deformation, I would recommend storing the scanner on its side rather than horizontally on its feet, and in a cool temperature.
|
Send me your comments!
Something didn't work as expected? You'd like to add some useful info to this tip? Use the form below to send me your comments. (Don't forget to fill out the super-lame CAPTCHA below..)